Emergency venous access for fluid resuscitation, drug infusion, and renal dialysis
 Infusions requiring central venous administration (vasopressors, calcium chloride, hyperosmolar solutions, hyperalimentation)
 Critically ill patients who cannot be placed flat or in Trendelenburg position due to respiratory distress
 Access site for transvenous pacemaker
 Nonemergent venous access due to inadequate peripheral IV sites
CONTRAINDICATIONS
 No absolute contraindications
 Relative Contraindications
 Coagulopathic patients (femoral approach is preferred over the subclavian and internal jugular approaches because it is more easily compressed)
 Combative or uncooperative patients
 Overlying infection, burn, or skin damage at puncture site
 Trauma to the ipsilateral groin or lower extremity
 Suspected proximal vascular injury, particularly of inferior vena cava (IVC)
 Ipsilateral renal transplant (risk of venous thrombosis)
RISKS/CONSENT ISSUES
 Pain (local anesthesia will be administered)
 Local bleeding and hematoma
 Infection (sterile technique will be utilized)
 General Basic Steps
 Vessel localization
 Analgesia
 Insertion
 Seldinger technique
 Dilation
 Catheter placement
 Confirmation
 Flush and secure
LANDMARK TECHNIQUE
Site of insertion is 2 to 3 cm inferior to the midpoint of inguinal ligament and 1 fingerbreadth medial to the femoral artery (FA) pulse (Figure 22.1). Anatomically, the structures underlying the inguinal ligament, from lateral to medial, are recalled by the mnemonic NAVEL.
Femoral Nerve
Common Femoral Artery
Common Femoral Vein
Empty Space
Lymphatics (FIGURE 22.1)
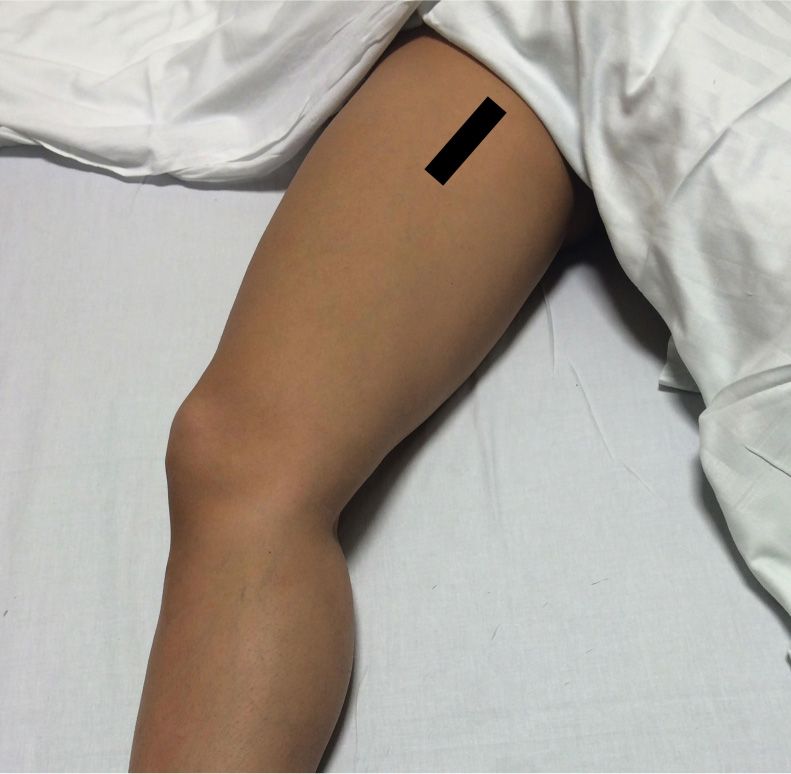
FIGURE 22.1 The thin line represents the pulsatile common femoral artery. The thick line 1 fingerbreadth medial to it represents the common femoral vein.
SUPPLIES
 Central Venous Catheter Kit
 Drapes, chlorhexidine prep (2), gauze
 Catheter (multiport, cordis, or hemodialysis)
 Guidewire within plastic sheath
 Lidocaine, anesthesia syringe, and small-gauge needle
 Three-inch introducer needle and syringe
 Dilator
 Scalpel
 Suture
 Sterile gloves, sterile gown, sterile cap and mask
 Sterile drapes
 Sterile saline flushes
 Sterile port caps
 Ultrasound machine (optional)
 Sterile ultrasound probe cover with sterile gel (optional)
TECHNIQUE
 Patient Preparation
 Cardiac monitoring to detect dysrhythmias triggered by wire advancement into the right ventricle
 Supplemental oxygen and continuous pulse oximetry monitoring
 Externally rotate the leg and slightly bend the knee to expose the groin
 If using ultrasound guidance, evaluate the right and left femoral veins (FVs) before prepping to confirm ideal vein location and compressibility
 Sterilize the entire groin with chlorhexidine or povidone–iodine solution
 Wear surgical cap, eye protection, mask, sterile gown and gloves
 Drape with sterile sheets, covering the body liberally
 If using ultrasound guidance, have an assistant place the probe (with gel applied) inside the sterile probe sheath
Note: Unless immediate emergent access is warranted, the physicians attempting the procedure must wear cap, eye protection, and mask, along with sterile gown and gloves.
 Vessel Localization
 If attempting to localize the right FV, use the right hand to hold the introducer needle and syringe. With the left hand, palpate the FA to avoid arterial puncture while guiding needle insertion. If attempting to localize the left FV, reverse hands.
 Analgesia
 Use a small-gauge needle to anesthetize skin and subcutaneous tissue with 1% lidocaine
 Insertion
 Attach a syringe to the introducer needle
 Using the above landmarks, insert the introducer needle at a 30- to 60-degree angle to skin just medial to the palpated FA pulse
 Apply negative pressure to the syringe plunger while advancing the needle 3 to 5 cm or until a flash of blood is seen in the syringe
 If no flash is obtained, withdraw the needle slowly while continuing to aspirate
 If redirecting the needle, always withdraw the needle to the level of skin before advancing again
 Once the needle enters vessel, blood will flow freely into the syringe
 Stabilize and hold the introducer needle
 Remove the syringe and ensure that venous blood continues to flow easily
 Use a finger to occlude the needle hub to prevent air embolism
 Seldinger Technique
 Advance the guidewire through the introducer needle. The wire should pass easily. Do not force it.
 Always hold on to the guidewire with one hand. Never let go of the guidewire.
 If resistance is met, withdraw the wire and rotate it, adjust the angle of needle entry, or remove the wire and reaspirate with the syringe to ensure the needle is still in the vessel.
 When at least half of the guidewire is advanced through the needle, remove the needle over wire. Keep one hand holding the wire at all times.
 Make a superficial skin incision with the bevel of the scalpel blade angled away from wire
 Ensure the incision is large enough to allow easy passage for the dilator
 Dilation
 Thread the dilator over the guidewire, always holding on to the wire
 Advance the dilator through the skin into the vessel with a firm, twisting motion while holding the guidewire with the nondominant hand
 Remove the dilator, leaving the guidewire in place
 Catheter Placement
 Thread the catheter over the guidewire and retract the guidewire until it emerges from the catheter’s port
 While holding the guidewire, advance the catheter through the skin into the vessel to the desired length
 Withdraw the guidewire through the catheter
 Use a syringe to aspirate blood from the catheter to confirm placement in the vein
 Confirmation
 Manometry
 Blood gas analysis
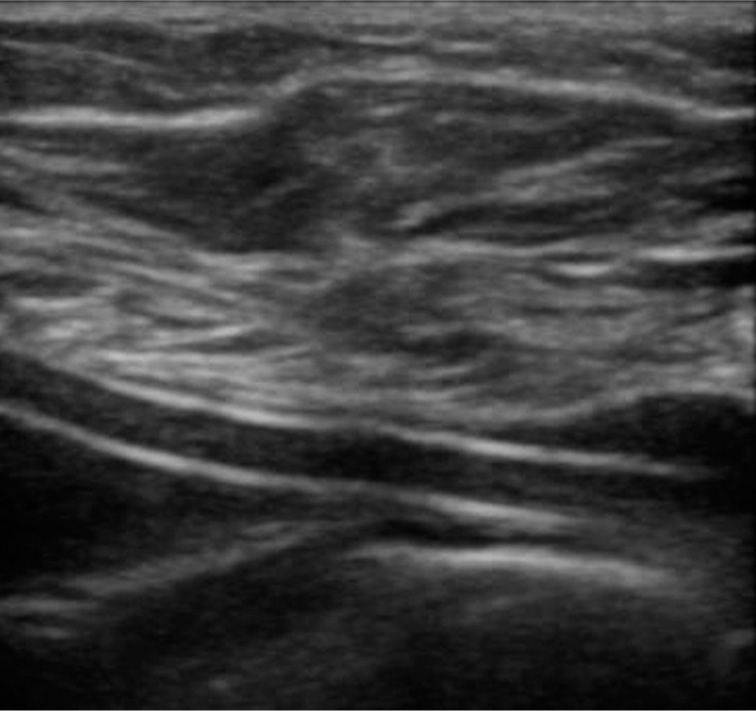
 Sonographic confirmation of the catheter in the vein (Figure 22.2)
 Postprocedure chest x-ray (CXR)
 Confirm the catheter tip in the superior vena cava just proximal to the right atrium
 Rule out pneumothorax
 Flush and Secure
 Aspirate, flush, and heplock each central line lumen
 Suture the catheter to the skin using silk or nylon sutures
 Cover the skin insertion site with a sterile dressing (bacteriostatic if available) (FIGURE 22.2)



Full access? Get Clinical Tree